1. Réamhrá
This manual provides detailed instructions for the installation, operation, and maintenance of your Evjuicion Wallbox 7.4 kW Type 2 Electric Vehicle (EV) Charger. This Level 2 charger is designed to provide efficient and reliable charging for your electric or hybrid vehicle. Please read this manual thoroughly before installation and use to ensure safe and optimal performance.
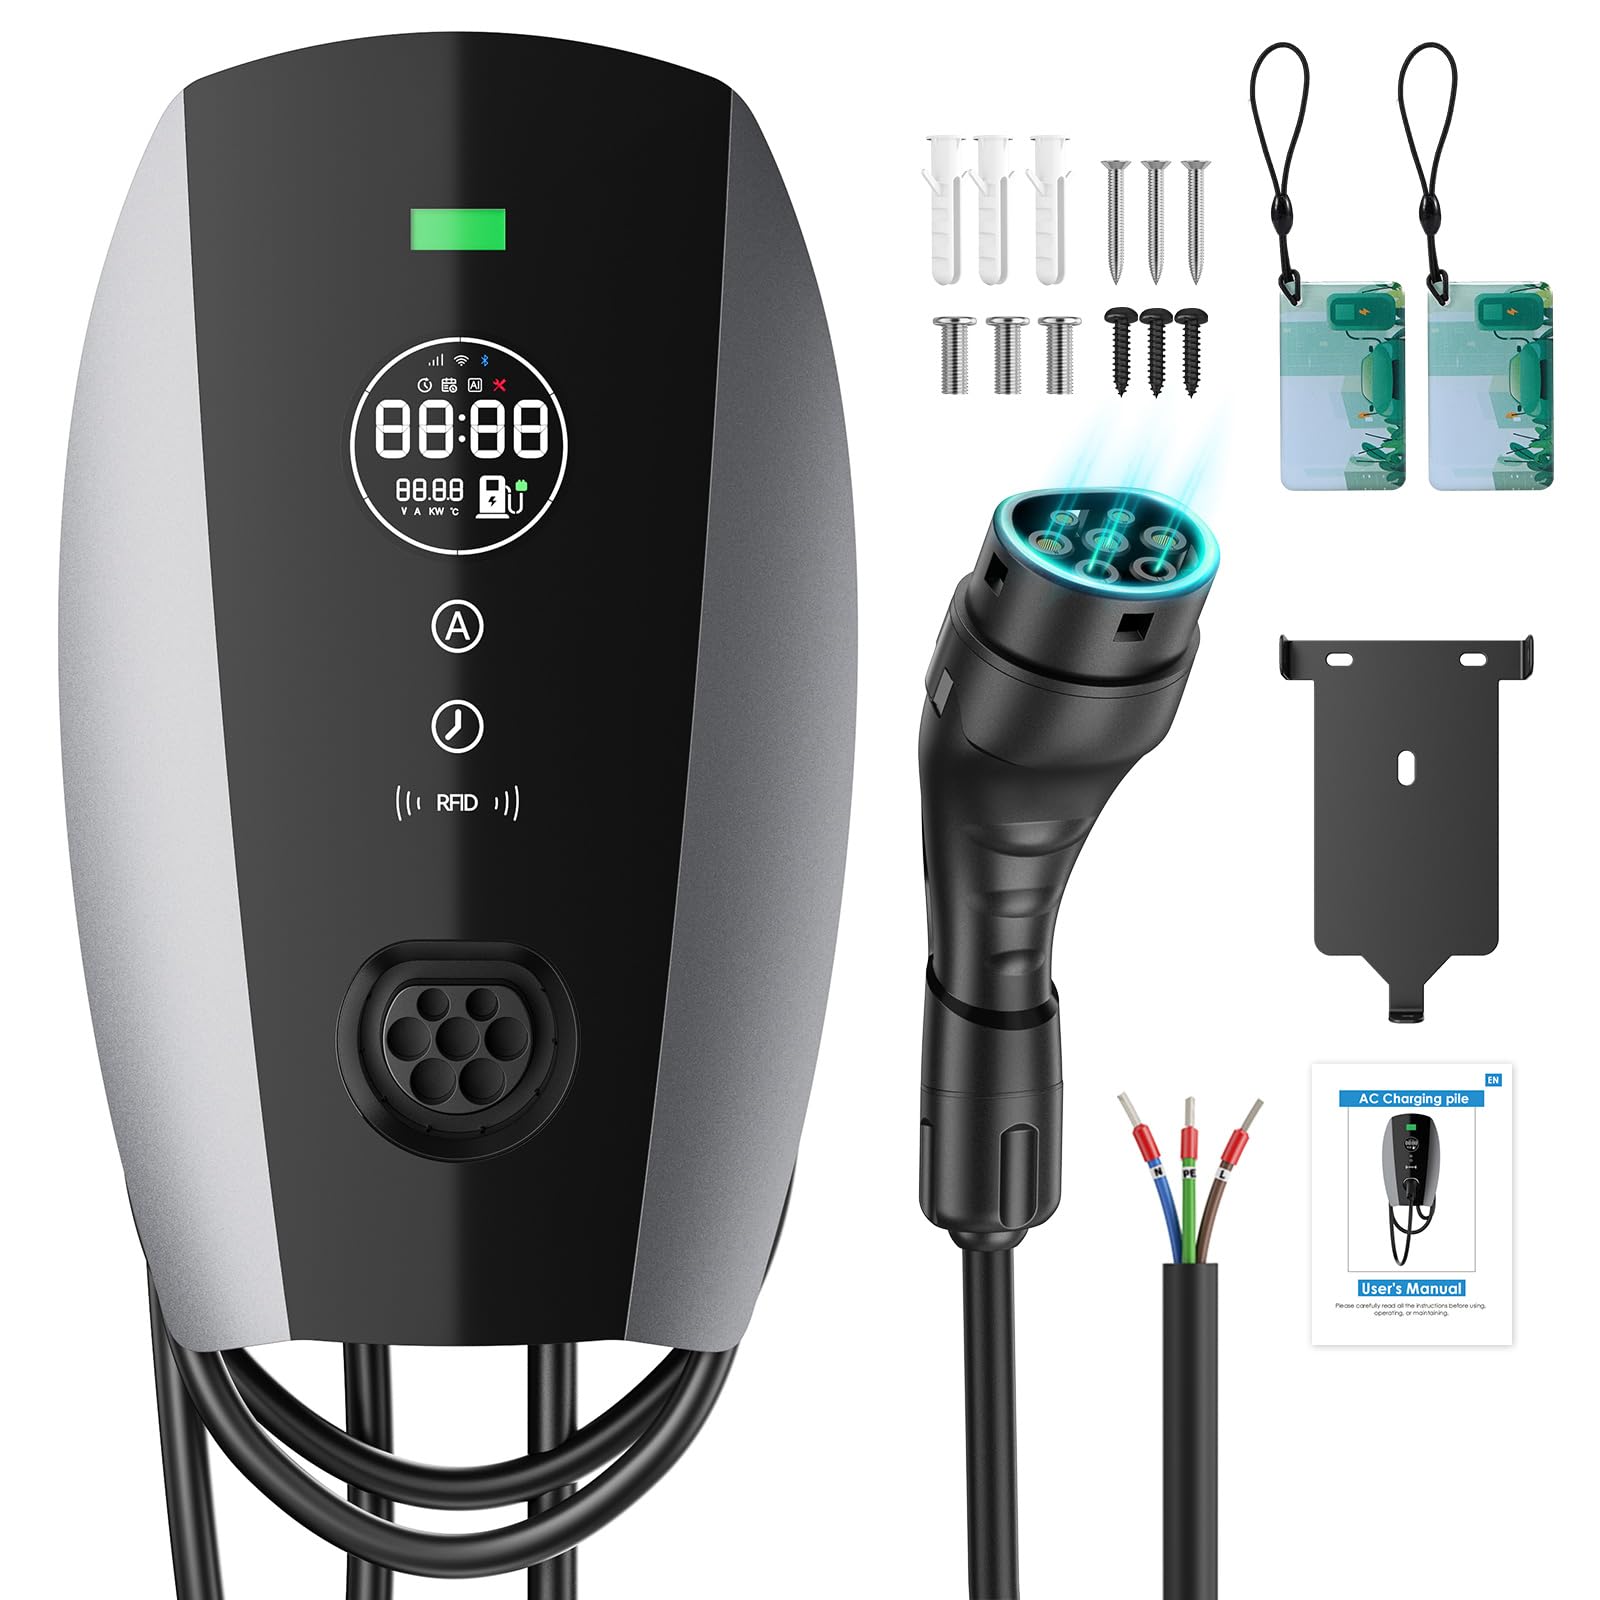
Figure 1: Evjuicion Wallbox 7.4 kW Type 2 EV Charger in use, illustrating rapid charging capabilities.
2. Faisnéis Sábháilteachta
Treoracha Sábháilteachta Tábhachtacha:
- Léigh na treoracha go léir roimh úsáid a bhaint as an táirge seo.
- This device must be installed by a qualified electrician in accordance with all local and national electrical codes and regulations.
- Do not use if the charging cable or connector is damaged, frayed, or shows any signs of wear.
- Do not immerse the charger or cable in water or other liquids.
- Do not operate the charger in explosive or flammable environments.
- Ensure the charging cable is properly routed to prevent tripping hazards or damage.
- Coinnigh leanaí ar shiúl ón limistéar luchtaithe le linn oibríochta.
- Dícheangail an chumhacht sula ndéantar aon chothabháil nó glanadh.

Figure 2: The Evjuicion Wallbox incorporates 8 layers of protection for safe and reliable charging, including safeguards against overcharges, thermal issues, ground faults, current leakage, high and low voltage, overloads, and lightning strikes.
3. Ábhar Pacáiste
Deimhnigh go bhfuil na míreanna go léir atá liostaithe thíos san áireamh i do phacáiste:
- 1 x EV Charger Unit (Evjuicion Wallbox 7.4 kW Type 2)
- 1 x Pláta Gléasta
- 1 x Charging Cable (5 meters, integrated)
- 3 x Flat-head Screws
- 3 x Expansion Anchors
- 3 x Round-head Self-tapping Screws
- 3 x Round-head Screws
- 1 x Lámhleabhar Úsáideora (an doiciméad seo)
4. Gnéithe Táirgí
The Evjuicion Wallbox 7.4 kW Type 2 EV Charger offers a range of features designed for convenience and efficiency:
- Muirearú Tapa: Delivers up to 7.4 kW power, significantly reducing charging times compared to standard chargers.
- Reatha Inchoigeartaithe: Selectable current settings (6A, 8A, 10A, 13A, 16A, 32A) to optimize charging based on vehicle and grid capacity.
- Timed Charging: Program charging start times up to 12 hours in advance to take advantage rátaí leictreachais seachbhuaice.
- 2.8-inch LED Display: Provides real-time information on current, voltage, charging status, temperature, and more.
- RFID Access: Secure charging activation using RFID cards, preventing unauthorized use.
- Dearadh Buan: IP65 rated for weather resistance, suitable for both indoor and outdoor installation, operating in temperatures from -20°C to +50°C.
- Bainistíocht Chomhtháite Cábla: Built-in cable holder for neat and organized storage of the 5-meter charging cable.
- Comhoiriúnacht Leathan: Compatible with 99% of EV and PHEV models adhering to the IEC 62196-2 standard (Type 2 connector).
- Ilchosaintí: Equipped with 8 safety protections including overcharge, thermal, leakage, high/low voltage, and lightning protection.

Figure 3: The charger features intelligent current adjustment and delayed charging options, allowing users to optimize charging schedules for cost savings during off-peak hours.

Figure 4: Designed for all-weather reliability, the Evjuicion Wallbox is IP65 rated for water and dust resistance, and can withstand extreme temperatures from -20°C to +50°C.

Figure 5: The charger offers wide compatibility with most EV and PHEV models, supporting Type 2 and CCS2 standards, ensuring hassle-free charging for a broad range of vehicles.
5. Socrú agus Suiteáil
The Evjuicion Wallbox can be installed on a wall or a dedicated charging column. Professional installation by a qualified electrician is highly recommended to ensure compliance with electrical codes and safety standards.
5.1 Installation Steps (Wall Mount ExampLe)
- Ullmhaigh an Suíomh Suiteála: Choose a suitable location near your parking spot, ensuring it is protected from direct impact and has access to the main electrical supply.
- Cumhacht a Dhícheangal: Before starting any electrical work, ensure the main power supply to the installation area is turned off at the circuit breaker.
- Suiteáil Pláta Feistithe:
- Use the included mounting plate as a template to mark the drilling points on the wall.
- Drill holes at the marked positions. Insert the expansion anchors into the drilled holes.
- Secure the mounting plate to the wall using the flat-head screws.
- Ceangal Leictreach:
- Remove the back cover of the charger unit.
- Connect the AC power supply wires to the designated terminals inside the charger. Ensure correct polarity (Live, Neutral, Ground).
- Secure all wiring connections firmly.
- Déan an clúdach cúil a athcheangal.
- Attach Charger Unit: Carefully align the charger unit with the mounted plate and secure it using the remaining screws (round-head self-tapping and round-head screws).
- Seiceálacha Deiridh: Double-check all connections and ensure the unit is securely mounted.
- Athchóirigh Cumhacht: Turn on the main power supply at the circuit breaker. The charger's LED display should illuminate.
Note: For column installation, follow similar steps, adapting to the specific column mounting hardware.
6. Treoracha Oibriúcháin
6.1 Understanding the LED Display and Indicators

Figure 6: The 2.8-inch LED display provides real-time monitoring of charging parameters and status indicators. A solid blue light indicates standby or charge completion, while a flashing green light signifies active charging.
The 2.8-inch LED display shows critical charging information. Familiarize yourself with the following indicators:
- Reatha (A): Displays the charging current in Ampeire.
- Imltage(V): Taispeánann an toirt reathatage.
- Cumhacht (kW): Indicates the charging power in kilowatts.
- Teocht (°C): Displays the internal temperature of the charger.
- Stádas Muirir: Icons indicate if charging is active, paused, or complete.
- Muirearú Sceidealta: Indicates if a timed charging session is set.
- Solas Táscaire LED:
- Gorm Soladach: Charger is in standby mode or charging is complete.
- Glas Gealánacha: Charger is actively charging the vehicle.
- Dearg: Indicates an error or fault. Refer to the Troubleshooting section.
6.2 Starting a Charge Session
- Connect the Vehicle: Plug the Type 2 connector firmly into your vehicle's charging port. Ensure a secure connection.
- Activate with RFID Card: Hold your RFID card over the designated RFID reader area on the charger. The charger will beep, and the LED display will show "RFID OK" or similar confirmation. Charging will begin automatically.
- Muirearú Monatóir: Observe the LED display for real-time charging data and the flashing green indicator light.

Figure 7: The 5-meter charging cable provides flexibility, and charging is securely activated using an RFID card to prevent unauthorized use.
6.3 Adjusting Charging Current
You can adjust the charging current (Amperage) to suit your needs or vehicle's requirements. This can help prolong battery life or manage grid load.
- Before or during a charging session, press the "A" button (Amperage adjustment) on the charger's control panel.
- Each press will cycle through the available current settings: 6A, 8A, 10A, 13A, 16A, 32A.
- Select your desired current. The display will update to reflect the new setting.
6.4 Setting Timed Charging
To schedule a delayed start for your charging session (e.g., for off-peak hours):
- Ceangail an cábla luchtaithe le d'fheithicil.
- Press the "Clock" button (Timed Charging) on the charger's control panel.
- Each press will increase the delay time in 1-hour increments, from 0 to 12 hours.
- Once the desired delay is set, the charger will wait for that duration before automatically starting the charging session.
- You can still use the RFID card to override the timer and start charging immediately if needed.
6.5 Stopping a Charge Session
- Trí Fheithicil: Most EVs allow you to stop charging from within the vehicle's infotainment system or app.
- Trí Charger: If your vehicle does not release the cable automatically, you may need to use the RFID card again to stop the session and unlock the connector.
- Dícheangail: Once charging has stopped and the cable is unlocked, safely disconnect the Type 2 connector from your vehicle.
- Store Cable: Return the charging cable to its integrated storage position on the charger.
7. Cothabháil
Regular maintenance ensures the longevity and safe operation of your Evjuicion Wallbox.
- Glanadh:
- Ensure the charger is powered off before cleaning.
- Glan taobh amuigh an luchtaire le clúdach bog,amp éadach. Ná húsáid glantóirí scríobacha, tuaslagóirí ná ceimiceáin ghéara.
- Keep the charging connector free from dust, dirt, and moisture.
- Cigireacht Cábla:
- Periodically inspect the charging cable and connector for any signs of damage, cuts, fraying, or discoloration.
- If any damage is found, discontinue use immediately and contact customer support.
- Stóráil Cábla: Always store the charging cable neatly using the integrated cable management system when not in use to prevent damage and tripping hazards.

Figure 8: The integrated cable management system ensures the charging cable is stored cleanly, organized, and practically, preventing tangles and maintaining a tidy charging area.
8. Fabhtcheartú
If you encounter issues with your Evjuicion Wallbox, refer to the following common problems and solutions:
| Fadhb | Cúis Féideartha | Réiteach |
|---|---|---|
| Charger does not power on / LED display is off. | Gan soláthar cumhachta; briseadh ciorcaid múchta. | Check the main power supply and circuit breaker. Ensure the charger is correctly wired and connected to power. |
| Charging does not start after connecting the vehicle and using RFID. | RFID card not recognized; vehicle not ready to charge; cable not fully inserted; charger error. |
|
| Tá an solas táscaire dearg ar siúl. | Internal fault or error. | Disconnect the vehicle, turn off the charger's power at the circuit breaker for a few minutes, then restore power. If the error persists, contact customer support. |
| Stopann an muirearú go tobann. | Vehicle battery full; power interruption; charger fault; vehicle fault. |
|
| RFID card lost. | Lost access to charger activation. | Contact Evjuicion customer service for assistance with replacement or alternative activation methods. |
If the problem persists after attempting these solutions, please contact Evjuicion customer support for further assistance.
9. Sonraíochtaí
| Paraiméadar | Luach |
|---|---|
| Múnla | ZAU207C-CS |
| Cumhacht Rátáil | 7.4 kW |
| Aschur Reatha | 32A (max) (Adjustable: 6A/8A/10A/13A/16A/32A) |
| Timed Charging | 0 - 12 uair an chloig |
| Fad Cábla | 5 méadar |
| Rátáil Cosanta | IP65 |
| Teocht Oibriúcháin | -20°C go +50°C |
| Toisí (Pacáiste) | 38 x 32 x 11 cm |
| Meáchan | 4.5 cileagram |
| Monaróir | Léiriú |
10. Barántas & Tacaíocht
Faisnéis Bharántas:
Evjuicion products are manufactured to high-quality standards. For specific warranty terms and conditions, please refer to the warranty card included with your product or visit the official Evjuicion websuíomh. Coinnigh do chruthúnas ceannaigh le haghaidh éilimh bharántais.
Tacaíocht do Chustaiméirí:
If you have any questions, require technical assistance, or need to report a problem with your Evjuicion Wallbox, please contact our customer support team. Contact details can typically be found on the product packaging, the official Evjuicion websuíomh, nó trí do mhiondíoltóir.
When contacting support, please have your product model number (ZAU207C-CS) and purchase date available.