1. Réamhrá
Go raibh maith agat as an gceannachasing the iTOMA AM/FM Alarm Clock Radio. This manual provides detailed instructions for setting up, operating, and maintaining your new device. Please read this manual thoroughly before use to ensure proper functionality and to maximize your user experience.
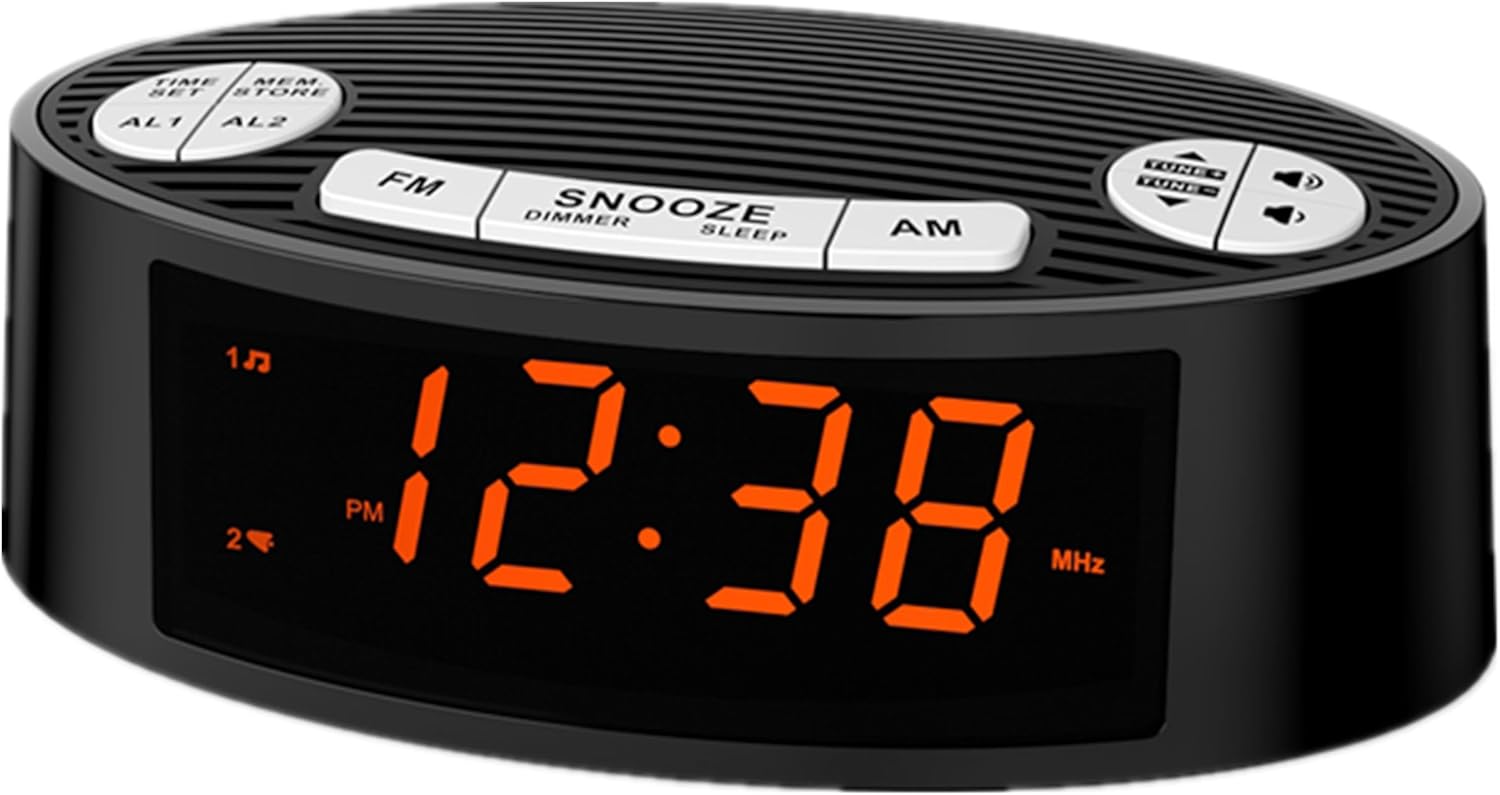
Íomhá 1.1: Tosaigh view of the iTOMA AM/FM Alarm Clock Radio CKS3301U with orange LED display.
2. Táirge Tharview
2.1 Comhpháirteanna agus Rialuithe
The iTOMA CKS3301U features an intuitive design with clearly labeled buttons for easy operation. Key components include:
- 0.9" Orange LED Display: For clear time and radio frequency display.
- Cnaipí Barrphainéil: Including TIME SET, MEM/STORE, AL1, AL2, FM, SNOOZE/DIMMER/SLEEP, AM, and TUNE/VOLUME controls.
- Painéal Cúil: Power input and antenna wire.

Íomhá 2.1: Tharview of the clock radio with icons indicating Volume, Snooze, Dual Alarm, 12H/24H Time Format, Dimmer, and AM/FM Radio functions.
2.2 Príomhghnéithe
- Taispeáint atá Éasca le Léamh: 0.9-inch orange LED display provides clear visibility.
- Maolaitheoir 4 Leibhéal: Adjust display brightness (L3/L2/L1/OFF) to suit your preference.
- Dé Aláraim: Socraigh dhá aláram neamhspleácha le roghanna chun dúiseacht le raidió nó le buzzer.
- Raidió AM/FM: Easy tuning with storage for up to 40 preset stations.
- Feidhm Snooze: Provides extra minutes of sleep.
- Uaineadóir Codlata: Allows the radio to play for a set duration before automatically turning off.
- Formáid Ama 12/24 Uair: Select your preferred time display.
- USB Powered: Operates via USB (AC adapter not included).
3. Socrú
- Ceangal Cumhachta: Connect the USB power cable to the clock radio. Plug the USB end into a compatible USB power adapter (nach bhfuil san áireamh) and then into a wall outlet. The unit requires a stable 5V USB power source.
- Socrú Antenna: Extend the FM antenna wire fully for optimal radio reception. Position it away from other electronic devices to minimize interference.
- Socrú Ama Tosaigh: Upon first power-up, the display may flash. Refer to the "Setting Time" section in Operating Instructions to set the current time.
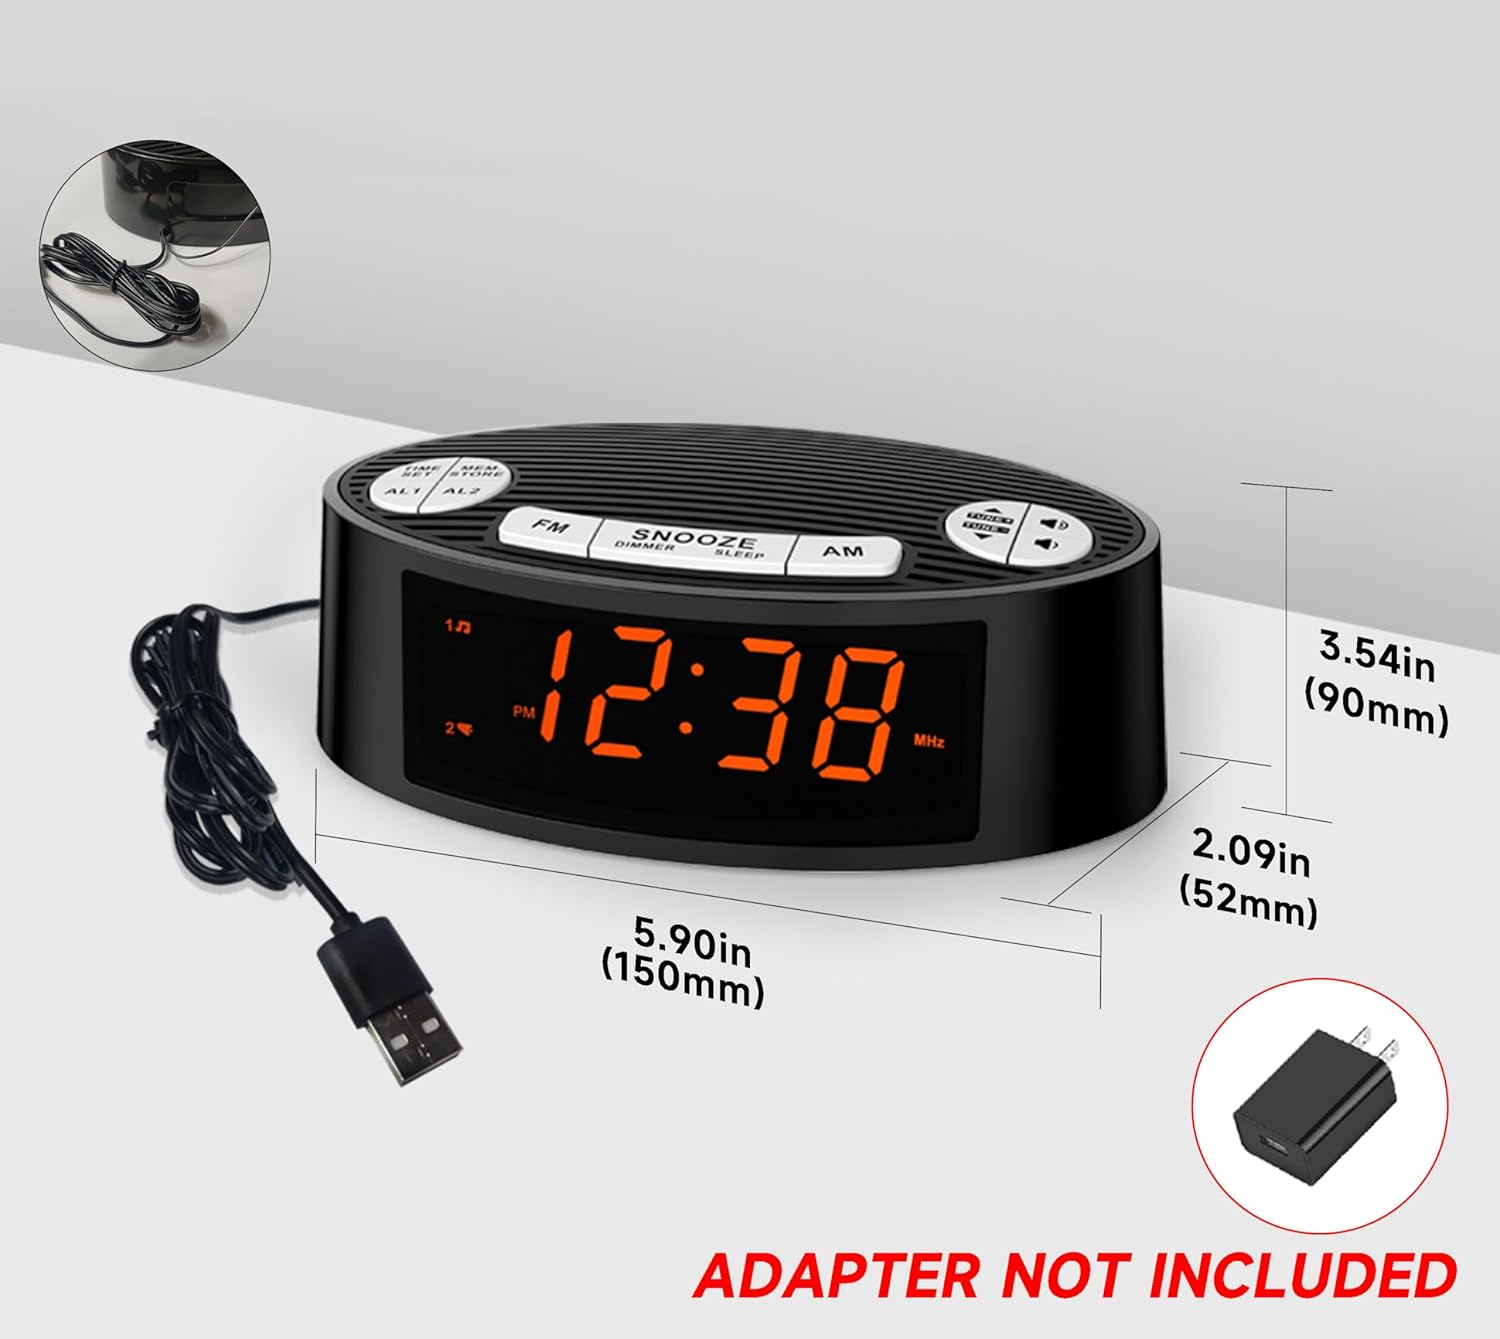
Image 3.1: Product dimensions and illustration of the USB power connection. Note that the AC adapter is not included.
4. Treoracha Oibriúcháin
4.1 Socrú Ama
- Brúigh agus coinnigh an SET AMA cnaipe. Tosóidh na digití uair an chloig ag splancadh.
- Bain úsáid as an TUNE/VOLUME UP or SÍOS cnaipí a choigeartú an uair an chloig.
- Brúigh SET AMA again to confirm the hour and move to minute setting. The minute digits will flash.
- Bain úsáid as an TUNE/VOLUME UP or SÍOS cnaipí chun na miontuairiscí a choigeartú.
- Brúigh SET AMA once more to save the time.
- Chun aistriú idir formáid 12 uair an chloig agus 24 uair an chloig, brúigh an AM button while the time is displayed. The PM indicator will show for 12-hour format.

Image 4.1: Illustration of switching between 24-hour and 12-hour time display formats.
4.2 Setting Alarms (AL1 / AL2)
The clock radio features two independent alarms (AL1 and AL2).
- Brúigh agus coinnigh an AL1 or AL2 cnaipe. Splancfaidh digití uair an chloig an aláraim.
- Bain úsáid as an TUNE/VOLUME UP or SÍOS cnaipí chun an uair aláraim a choigeartú.
- Brúigh AL1 or AL2 again to confirm the hour and move to minute setting. The alarm minute digits will flash.
- Bain úsáid as an TUNE/VOLUME UP or SÍOS cnaipí chun nóiméid an aláraim a choigeartú.
- Brúigh AL1 or AL2 once more to select the alarm source: Raidió or dordánaí. The corresponding icon will appear on the display.
- Brúigh AL1 or AL2 again to save the alarm setting.
- To activate/deactivate an alarm, briefly press the AL1 or AL2 button. The alarm icon will appear/disappear on the display.

Image 4.2: The display indicating dual alarm functionality with options for AM/FM radio or buzzer.
4.3 Oibriú Raidió AM/FM
- Brúigh an FM or AM button to turn on the radio and select the band.
- Brúigh an TUNE/VOLUME UP or SÍOS buttons briefly to fine-tune the frequency. Press and hold to auto-scan for the next available station.
- To store a preset station: While listening to a station, press and hold the MEM / STÓR button. The preset number will flash. Use TUNE/VOLUME UP or SÍOS to select a preset number (up to 40). Press MEM / STÓR arís le sábháil.
- To recall a preset station: Briefly press the MEM / STÓR button repeatedly to cycle through stored stations.
- Coigeartaigh an toirt ag baint úsáide as an TUNE/VOLUME UP or SÍOS buttons when not in tuning mode.
- Chun an raidió a chasadh as, brúigh an FM or AM cnaipe arís.

Image 4.3: Visual representation of the AM/FM radio function with a signal icon and musical notes.
4.4 Rialú Maolaithe
The display brightness can be adjusted to four levels:
- L3: Highest brightness
- L2: Gile meánach
- L1: Gile íseal
- AS: Display completely off
To adjust, briefly press the CODLADH/DIMMEÁDÚ/CODLADH brúigh an cnaipe arís agus arís eile chun na leibhéil gile a athrú.
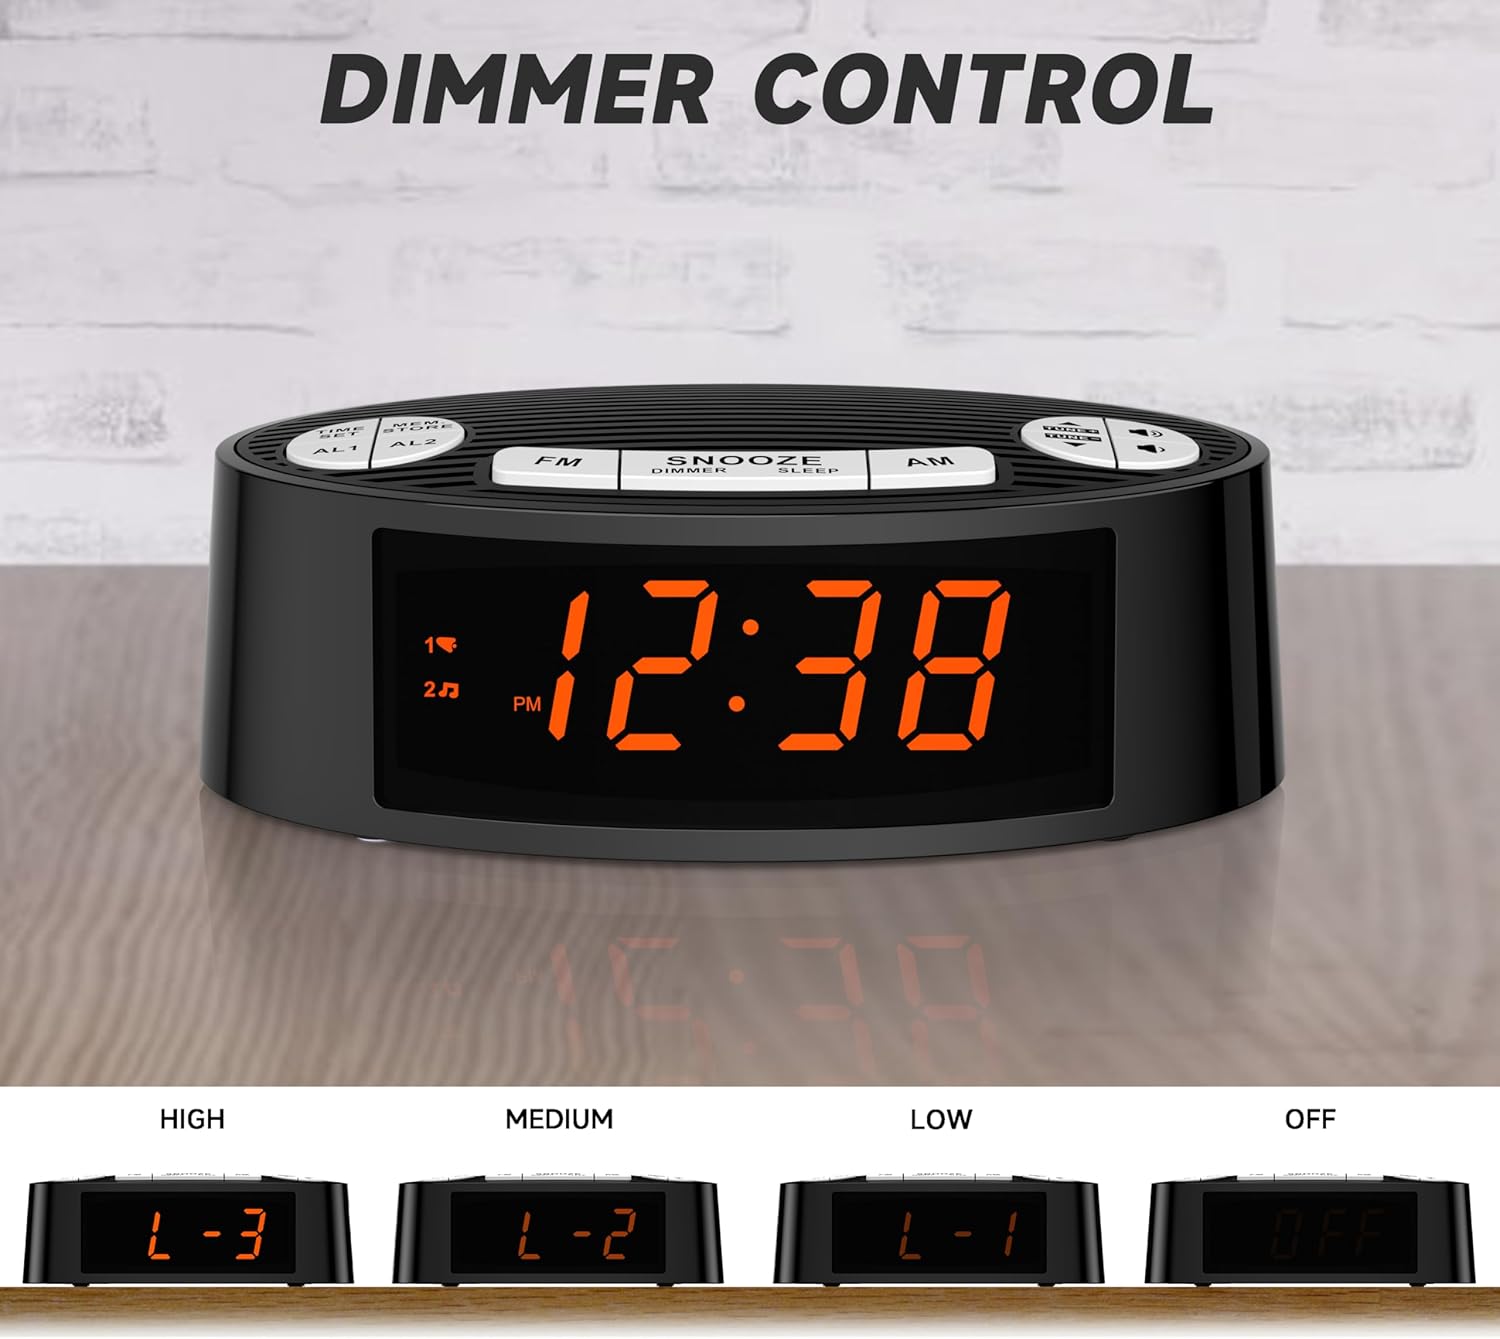
Image 4.4: The four available dimmer settings for the LED display: High (L-3), Medium (L-2), Low (L-1), and Off.
4.5 Snooze and Sleep Functions
- Cur ar suan: Nuair a chloiseann tú aláram, brúigh an cnaipe mór CODLADH/DIMMEÁDÚ/CODLADH cnaipe chun an t-aláram a chur ar thost go sealadach ar feadh thart ar 9 nóiméad. Cluinfidh an t-aláram arís tar éis na tréimhse suain.
- Uaineadóir Codlata: While the radio is playing, press and hold the CODLADH/DIMMEÁDÚ/CODLADH button to activate the sleep timer. Repeatedly press the button to cycle through preset sleep times (e.g., 90, 60, 30, 15 minutes, or OFF). The radio will automatically turn off after the selected duration.

Image 4.5: A hand pressing the large snooze button on top of the clock radio, indicating the easy access for an extra 9 minutes of sleep.
5. Cothabháil
- Glanadh: Bain úsáid as éadach bog, tirim chun dromchla an aonaid a ghlanadh. Ná húsáid glantóirí scríobacha ná tuaslagóirí.
- Socrúchán: Place the unit on a stable, flat surface. Avoid placing it in direct sunlight, near heat sources, or in excessively humid or dusty environments.
- Dícheangal Cumhachta: Dícheangail an cábla cumhachta ón asraon balla mura n-úsáidfear an t-aonad ar feadh tréimhse fada.
6. Fabhtcheartú
| Fadhb | Cúis Féideartha | Réiteach |
|---|---|---|
| Gan chumhacht/Taispeántas múchta | Power cable not connected or power outlet not active. | Ensure the USB power cable is securely connected to the unit and a working USB power adapter (5V) plugged into a live wall outlet. |
| Fáiltiú raidió lag | FM antenna not fully extended or interference from other electronics. | Fully extend the FM antenna wire. Reposition the unit or antenna away from other electronic devices that may cause interference. |
| Ní chloiseann an t-aláram | Alarm not activated or set incorrectly. Volume too low for radio alarm. | Verify that the alarm is activated (alarm icon visible on display). Check alarm time and source (radio/buzzer). If radio alarm, ensure radio volume is audible. |
| Time/settings reset after power loss | No battery backup or backup battery depleted (if applicable). | This model does not contain button batteries for backup. Settings will need to be re-entered after a power interruption. |
7. Sonraíochtaí
| Gné | Sonraigh |
|---|---|
| Branda | iTOMA |
| Uimhir Mhúnla | CKS3301U (also referred to as CKS2100 in some specifications) |
| Cineál Taispeána | 0.9" Orange LED |
| Dimmer Levels | 4 (L3/L2/L1/OFF) |
| Cineál Aláraim | Aláram Dúbailte (Raidió nó Buzzer) |
| Bannaí Raidió | AM/FM |
| Stáisiúin Réamhshocraithe | Suas le 40 |
| Formáid Ama | Inroghnaithe 12/24 Uair |
| Foinse Cumhachta | USB port (AC Adapter not included) |
| Toisí Táirge | 5.9"L x 3.54"A (thart ar 150mm L x 90mm A) |
| Meáchan Mír | 8.8 unsa |
| Ábhar | Plaisteach |
8. Barántas agus Tacaíocht
For detailed warranty information, please refer to the documentation included with your purchase or contact iTOMA customer support directly. You can also find additional resources, including a PDF user guide, on the product's Amazon listing page or the iTOMA official websuíomh.
Acmhainní Ar Líne:
For further assistance, please contact iTOMA customer service.