
Eolas Tábhachtach Sábháilteachta
Please read these instructions carefully before installation. If you do not understand these instructions or have doubts about the safety of the installation, please contact a qualified installer. The manufacturer is not liable for damage or injury caused by incorrect assembly or use.
- Cumas Meáchan: Do not exceed the maximum weight capacity specified for your model. Overloading can result in serious injury or property damage.
- Struchtúr Balla: The wall mount must be securely attached to a suitable wall structure. Do not install on drywall alone. Ensure the mounting surface can safely support the combined weight of the mount and the television.
- Comhoiriúnacht VESA: Verify your TV's VESA mounting pattern (hole spacing) is compatible with this mount.
- Páistí: Keep children away from the installation area. Small parts may be a choking hazard.
- Uirlisí: Úsáid uirlisí cuí le haghaidh suiteáil.
Comhoiriúnacht Táirge
This instruction manual covers two models of PERLESMITH Full Motion TV Wall Mounts, PSMFK7 and PSMFK1. Please identify your model and confirm your television's specifications before proceeding with installation.
Model PSMFK7
- Comhoiriúnacht Méid an Scáileáin: Most 26-55 inch TVs.
- Cumas Meáchan: Up to 70 lbs (31.7 kg).
- Patrúin VESA: 100x100mm to 400x400mm.

Figure 1: PSMFK7 Model Compatibility Overview. This image illustrates the supported screen sizes (26-55 inches), maximum weight capacity (70 lbs), and VESA mounting patterns (100x100mm to 400x400mm) for the PSMFK7 TV wall mount.
Model PSMFK1
- Comhoiriúnacht Méid an Scáileáin: Most 26-60 inch TVs.
- Cumas Meáchan: Up to 77 lbs (35 kg).
- Patrúin VESA: Up to 400x400mm (16x16 inches).

Figure 2: PSMFK1 Model Compatibility and Wall Types. This image details the wide compatibility of the PSMFK1 model, supporting TVs up to 60 inches and various VESA patterns. It also indicates suitability for single wood stud, brick, and concrete walls.
Confirm Before Purchase
Roimh cheannachasing or installing, ensure your TV meets the following criteria:
- Meáchan Teilifíse: Your TV's weight is within the mount's capacity (70 lbs for PSMFK7, 77 lbs for PSMFK1).
- Méid teilifíse: Your TV's screen size is within the recommended range (26-55" for PSMFK7, 26-60" for PSMFK1).
- Patrún VESA: Your TV's VESA mounting holes match one of the supported patterns.
- Cineál Balla: Your wall is suitable for installation (single wood stud, concrete, or brick).
- Cable Blockage: Ensure the mounting holes on your TV do not block any cables or inputs.

Figure 3: Pre-Purchase Confirmation Checklist. This image provides a visual summary of essential checks to perform before installing the TV mount, including TV weight, size, VESA, wall type, and potential cable interference.
Cad atá san áireamh
Carefully unpack the box and ensure all parts are present and undamaged. If any parts are missing or damaged, do not attempt to install. Contact customer service for assistance.
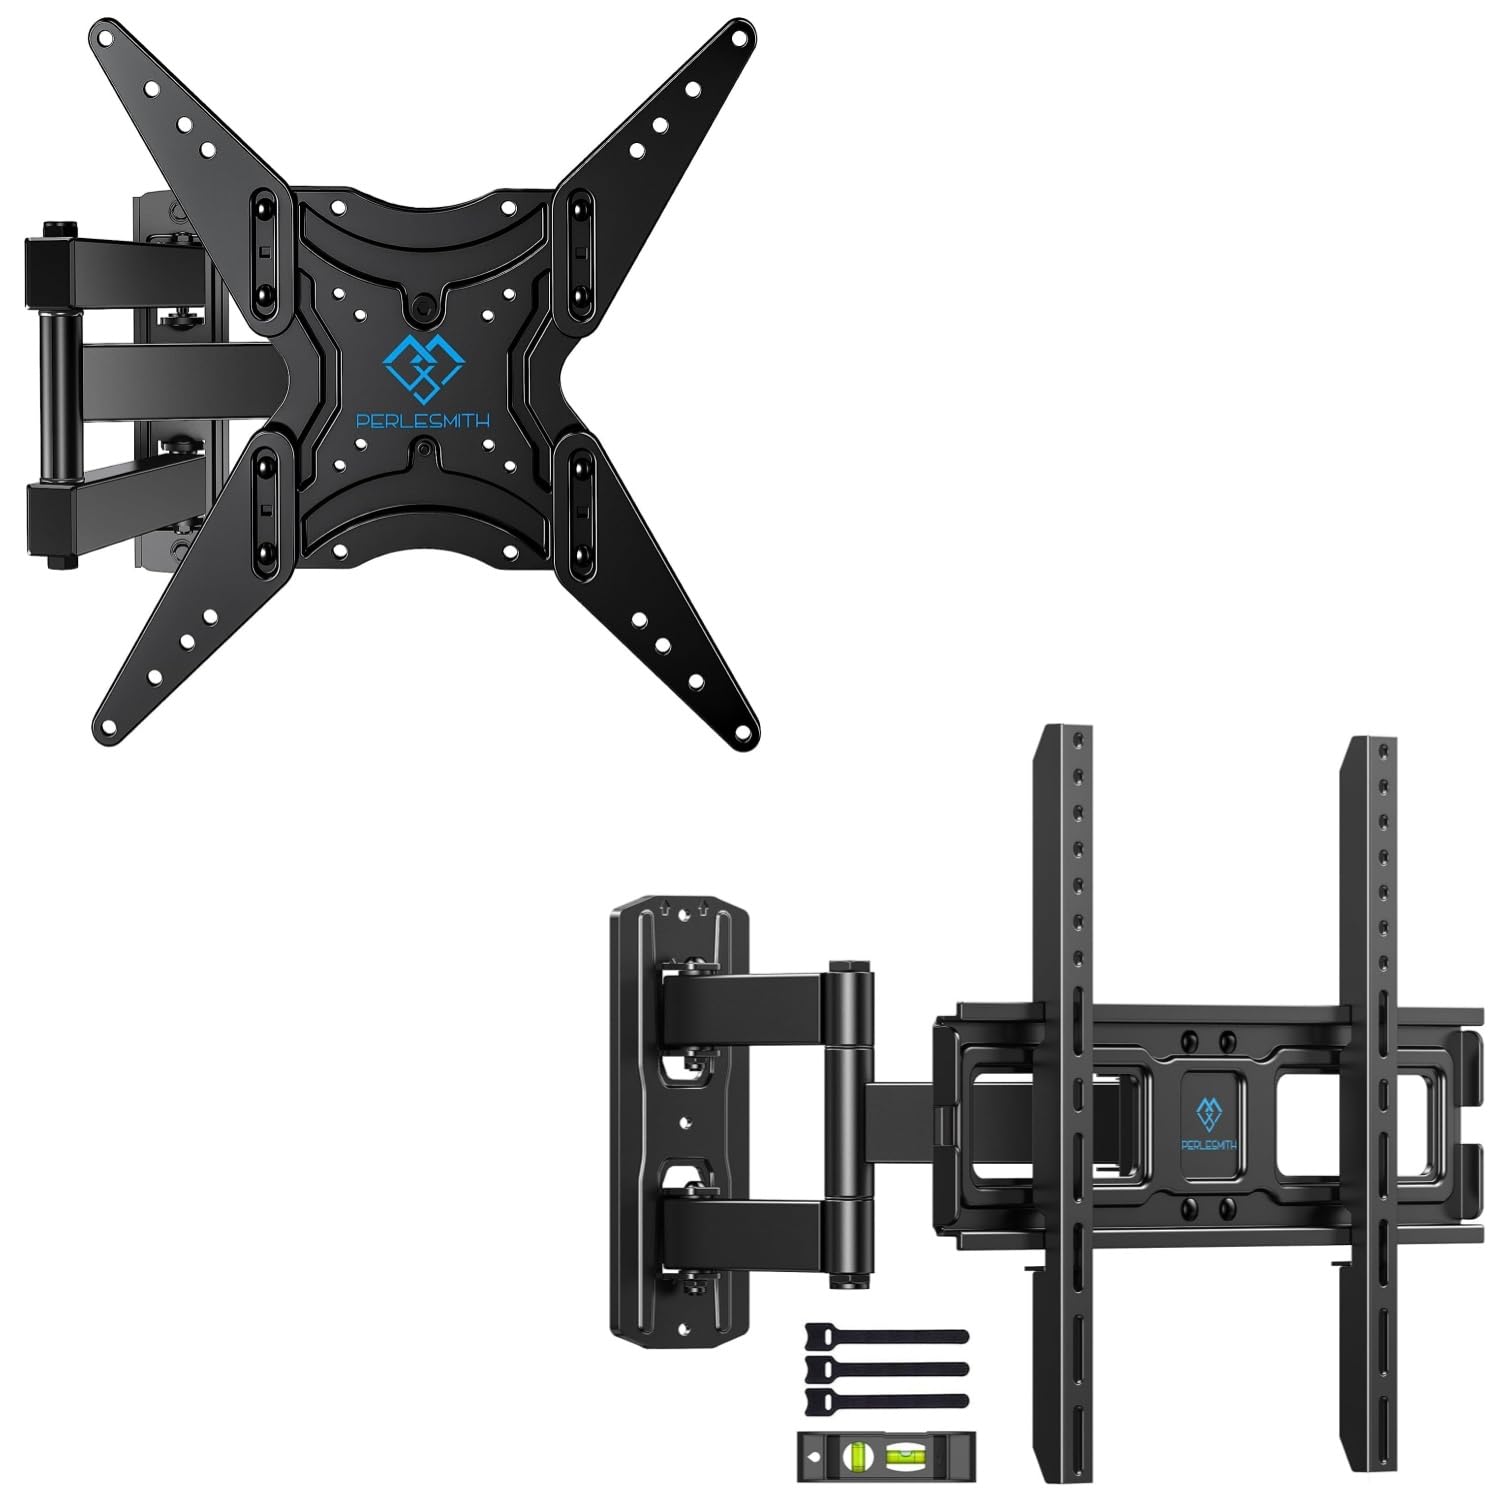
Figure 4: Package Contents. This image displays the main components of the PERLESMITH full motion TV wall mount kit, including the mount assembly, a bubble level for installation, and cable ties for cable management.
Typical Package Contents:
- Full Motion TV Wall Mount Assembly
- TV Brackets (x2)
- Trealamh Crua-earraí Gléasta (scriúnna, leicneáin, spásairí, ancairí éagsúla)
- Leibhéal mboilgeog
- Ceangail Cábla (x3)
- Lámhleabhar Treoraithe
Socrú agus Suiteáil
Proper installation is crucial for the safety and stability of your TV. Follow these steps carefully.
Sula dTosaíonn Tú
- Gather all necessary tools (e.g., drill, stud finder, level, screwdriver, tape measure).
- Ensure you have a clear, safe workspace.
- Confirm your TV and wall meet the compatibility requirements.
Wall Type Considerations
This mount is designed for installation on:
- Single Wood Stud: Locate the center of the wood stud using a stud finder.
- Solid Concrete Wall: Requires a masonry drill bit and concrete anchors.
- Balla Bríce: Requires a masonry drill bit and brick anchors.
RABHADH: Do not install this TV mount on drywall alone. Drywall cannot support the weight of the mount and TV.
Céimeanna Suiteála Ginearálta
- Ceangail lúibíní teilifíse leis an teilifís: Secure the vertical TV brackets to the back of your television using the appropriate screws, washers, and spacers from the hardware kit. Ensure the brackets are centered and level.
- Determine Wall Plate Position: Hold the wall plate against the wall at your desired viewing height. Use the included bubble level to ensure it is perfectly horizontal. Mark the drilling locations.
- Poill Píolótach Druileála: Drill pilot holes at the marked locations. For wood studs, drill directly. For concrete or brick, use a masonry bit and insert concrete/brick anchors.
- Pláta Balla Slán: Attach the wall plate to the wall using the lag bolts and washers. Tighten securely, but do not overtighten.
- Hang TV on Wall Plate: Carefully lift the TV (with brackets attached) and hook the brackets onto the wall plate. Ensure the TV is securely seated.
- Teilifís Shlán le Gléasadh: Use the safety screws or locking mechanisms on the TV brackets to secure the TV to the wall mount, preventing accidental dislodgement.

Figure 5: Centering Your TV. This image demonstrates a TV mounted centrally on a wall, providing a visual guide for optimal placement above a feature like a fireplace.

Figure 6: Corner Mounting Example. This image illustrates how the full motion design allows for effective TV placement in a room corner, maximizing viewuillinneacha.
Coigeartuithe Oibriúcháin
The full motion design allows for flexible viewing angles. Adjustments can be made after installation.
- Tilt: The TV can be tilted +5° upwards to -15° downwards to reduce glare or optimize viewing from different heights. Loosen the tilt knobs on the TV brackets, adjust to the desired angle, and re-tighten.
- Sclóine: The articulating arm allows the TV to swivel up to +/-90° (180° total range) left or right, depending on TV size and wall distance. Gently push or pull the TV to the desired angle.
- Síneadh/Tarraingt Siar: The mount can extend the TV up to 19.17 inches (48.7 cm) from the wall for optimal viewing or retract it back to 3.2 inches (8.1 cm) for a low-profile cuma.
- Leibhéalta: After installation, the TV can be leveled +/-3° to correct any minor misalignments. Loosen the leveling screws, adjust, and re-tighten.

Figure 7: Full Motion Adjustments. This image visually explains the tilt, extension, swivel, and leveling features of the TV mount, demonstrating the range of motion available for optimal viewing.
Cothabháil
Cinntíonn cothabháil rialta go mairfidh gléas balla do theilifíse go sábháilte agus go mbeidh sé ag obair go maith.
- Glanadh: Cuimil an gléas le héadach bog tirim chun deannach a bhaint. Seachain glantóirí scríobacha nó tuaslagóirí.
- Seiceáil Naisc: Seiceáil na scriúnna agus na naisc go léir go tréimhsiúil lena chinntiú go bhfuil siad daingean agus slán. Aththéann más gá.
- Iniúchadh le haghaidh Damáiste: Regularly inspect the mount for any signs of wear, corrosion, or damage. If any issues are found, discontinue use and contact customer support.
Fabhtcheartú
Má bhíonn fadhbanna agat le linn nó i ndiaidh na suiteála, féach ar na fadhbanna agus na réitigh choitianta seo a leanas.
| Fadhb | Cúis Féideartha | Réiteach |
|---|---|---|
| Níl an teilifís cothrom tar éis a suiteála. | Minor misalignment during installation. | Use the +/-3° leveling adjustment feature. Loosen leveling screws, adjust, and re-tighten. |
| Mothaíonn an gléas scaoilte nó éagobhsaí. | Screws not fully tightened; incorrect wall anchors used; wall structure insufficient. | Ensure all mounting screws are securely tightened. Verify correct anchors for your wall type. If the wall is insufficient, consult a professional. |
| Difficulty adjusting tilt or swivel. | Adjustment knobs/bolts are too tight. | Loosen the relevant adjustment knobs or bolts slightly, make the adjustment, then re-tighten to hold the position. |
| Ní oireann an teilifís don ghléas. | Incorrect TV size, weight, or VESA pattern for the mount model. | Verify your TV's specifications against the mount's compatibility (refer to Product Compatibility section). |
Sonraíochtaí Táirge
| Gné | PSMFK7 Model | PSMFK1 Model |
|---|---|---|
| Cineál Gléasta | Wall Mount | |
| Cineál Gluaiseachta | Articulating, Swivel, Tilt | |
| Méideanna Scáileán Comhoiriúnach | 26 - 55 Orlach | 26 - 60 Orlach |
| Cumas Meáchan uasta | 70 lb (31.7 kg) | 77 lb (35 kg) |
| Comhoiriúnacht VESA | 100x100mm go 400x400mm | Suas go dtí 400x400mm |
| Uillinn tilt | +5° / -15° | |
| Uillinn Sclóine | +/-90° (up to 180° total, depending on TV size) | |
| Coigeartú Leibhéalta | +/- 3° | |
| Síneadh ón mBalla | 3.2 orlach (tarraingthe siar) go 19.17 orlach (sínte) | |
| Ábhar | Cruach Cóimhiotail | |
| Cineálacha Balla Comhoiriúnacha | Single Wood Stud, Solid Concrete, Brick Wall | |
Barántas agus Tacaíocht
For warranty information or technical support, please refer to the product packaging or contact PERLESMITH customer service directly. Keep your purchase receipt for warranty claims.
If you have any questions or require assistance with installation or operation, please do not hesitate to reach out to our support team.