
Réamhrá
Thank you for choosing the BUFFBEE Alarm Clock with Wireless Charging Station. This device combines a digital alarm clock with a versatile wireless charging stand, designed to charge your iPhone, Apple Watch, and AirPods simultaneously. It features a dimmable LED display, adjustable volume, and multiple safety protections to ensure efficient and secure charging. Please read this manual carefully before use to ensure proper operation and to maximize the lifespan of your product.
Cad atá sa Bhosca
Nuair a osclaíonn tú do phacáiste, déan cinnte go bhfuil na míreanna seo a leanas go léir san áireamh:
- BUFFBEE Alarm Clock with Wireless Charging Station
- Cábla Muirearú USB-C
- Cuibheoir Cumhachta
- Lámhleabhar Úsáideora (an doiciméad seo)
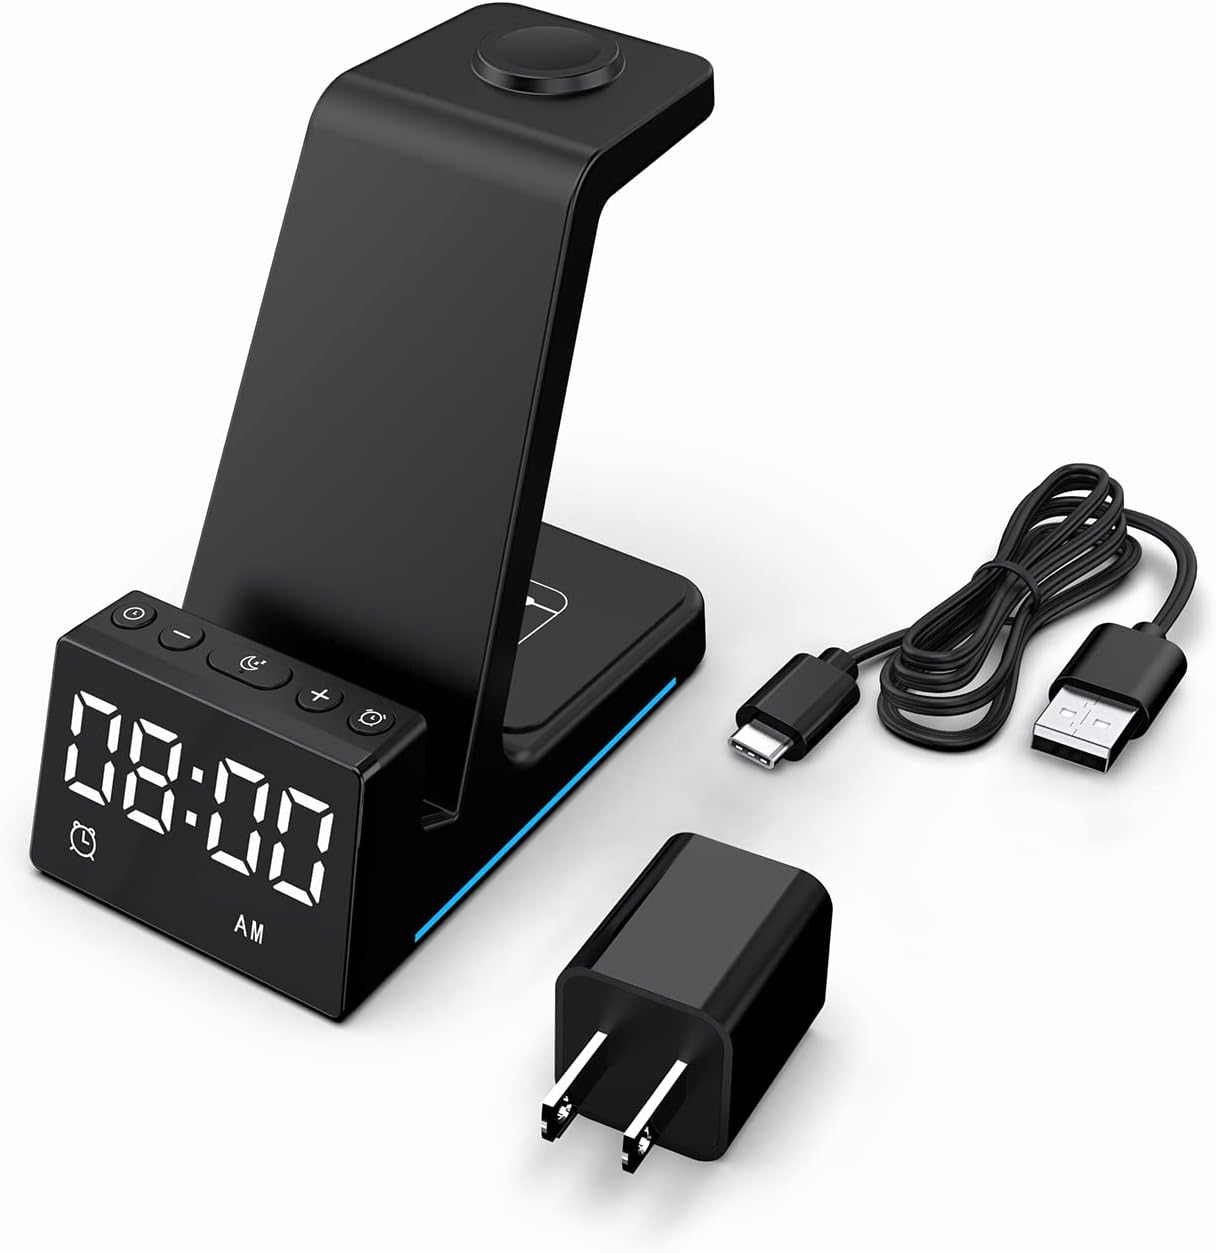
Image: All components included in the product packaging.
Táirge Tharview
The BUFFBEE Alarm Clock with Wireless Charging Station is designed for convenience and efficiency. It features dedicated charging areas for your smartphone, Apple Watch, and AirPods, alongside a clear digital clock display.
Príomhghnéithe:
- Clog Aláraim Digiteach: Features adjustable brightness and volume, with 12/24 hour format options.
- Wireless Phone Charging: Supports 15W, 10W, 7.5W, and 5W output for various wireless charging enabled smartphones.
- Muirearú Apple Watch: Dedicated magnetic charging spot for Apple Watch Series 2-7, SE.
- Muirearú AirPods: Wireless charging pad for AirPods 2 (with wireless charging case), AirPods 3, and AirPods Pro.
- Cosaintí Sábháilteachta: Built-in overcharge, overvoltage, overheat, and overcurrent protection.

Image: The charging station with devices in place, highlighting its multi-device capability.

Image: Diagram illustrating the internal safety features and charging coils.
Socrú
Follow these steps to set up your BUFFBEE Alarm Clock with Wireless Charging Station:
- Cumhacht Ceangail: Insert the USB-C end of the charging cable into the port on the back of the charging station. Plug the other end of the cable into the provided power adapter, then plug the adapter into a wall outlet. The digital display will light up, indicating power is connected.
- Gléasanna Áit:
- Fón cliste: Place your wireless charging enabled smartphone vertically or horizontally on the main charging stand. Ensure it is centered for optimal charging.
- Apple Watch: Place your Apple Watch on the magnetic charging disc at the top of the stand.
- AirPods: Place your AirPods (with wireless charging case) on the flat charging pad at the base of the unit.
- Fíoraigh Muirearú: A blue indicator light will briefly illuminate when a device is correctly placed and charging. Your device's screen will also show a charging icon.
Video: Official product video demonstrating the setup and charging capabilities of the BUFFBEE Alarm Clock with Wireless Charging Station for iPhone, Apple Watch, and AirPods.

Image: Universal compatibility chart for different devices and charging wattagtá.
Treoracha Oibriúcháin
Ag Socrú an Ama
- Brúigh agus coinnigh an Socraigh Am button (usually marked with a clock icon) for 3 seconds. The hour digits will begin to flash.
- Bain úsáid as an + agus - cnaipí a choigeartú an uair an chloig.
- Brúigh an Socraigh Am button again to switch to minute adjustment. The minute digits will flash.
- Bain úsáid as an + agus - cnaipí chun na miontuairiscí a choigeartú.
- Brúigh an Socraigh Am cnaipe uair amháin eile chun a dhearbhú agus imeacht ón modh socraithe ama.
- To switch between 12-hour and 24-hour format, briefly press the Socraigh Am button when not in setting mode.
Socrú an Aláraim
- Brúigh agus coinnigh an Aláram Socraithe button (usually marked with an alarm clock icon) for 3 seconds. The alarm hour digits will flash.
- Bain úsáid as an + agus - cnaipí chun an uair aláraim a choigeartú.
- Brúigh an Aláram Socraithe button again to switch to alarm minute adjustment. The alarm minute digits will flash.
- Bain úsáid as an + agus - cnaipí chun nóiméid an aláraim a choigeartú.
- Brúigh an Aláram Socraithe cnaipe uair amháin eile chun a dhearbhú agus imeacht ó mhodh socraithe aláraim.
- Chun an t-aláram a ghníomhachtú nó a dhíghníomhachtú, brúigh go hachomair an Aláram Socraithe cnaipe. Feicfear/imeoidh deilbhín aláraim ar an taispeáint.
- When the alarm sounds, press any button to activate the snooze function (typically 9 minutes). To turn off the alarm completely, press and hold the Aláram Socraithe cnaipe.

Íomhá: Tharview of the digital alarm clock features.
Gile Taispeána a Choigeartú
The LED display has multiple brightness levels to suit your preference, especially for nighttime use.
- Brúigh an Gile button (usually marked with a sun icon) repeatedly to cycle through the available brightness levels (e.g., 100%, 40%, 3%, 1%, 0% off).
- Select the desired brightness level. The '0% off' setting turns the display completely off for undisturbed sleep.

Image: Visual representation of the 5-level adjustable brightness settings.
Toirt Aláraim a Choigeartú
The alarm volume can be adjusted to your preferred level.
- While the alarm is sounding, or during alarm setting mode, press the Toirt button (usually marked with a speaker icon) to cycle through the available volume levels.
- Select the desired volume.

Image: Illustration of the 3-level adjustable volume feature.
Cothabháil
To ensure the longevity and optimal performance of your charging station, follow these maintenance guidelines:
- Glanadh: Disconnect the power before cleaning. Use a soft, dry cloth to wipe the surface. Do not use abrasive cleaners, solvents, or chemical sprays.
- Seachain Leachtanna: Keep the device away from water and other liquids. Do not operate with wet hands.
- Teocht: Store and operate the device in a dry environment at room temperature. Avoid extreme heat or cold.
- Láimhseáil: Láimhseáil an gléas go cúramach. Seachain titim air nó é a chur faoi thionchar láidir.
- Soláthar Cumhachta: Only use the provided power adapter and cable. Using unauthorized power sources may damage the device and void the warranty.
Fabhtcheartú
If you encounter any issues with your BUFFBEE Alarm Clock with Wireless Charging Station, please refer to the following troubleshooting guide:
| Fadhb | Cúis Féideartha | Réiteach |
|---|---|---|
| Device is not powering on. | Power cable not connected properly; Power adapter faulty; Wall outlet not working. | Ensure the USB-C cable is securely connected to both the station and the power adapter. Try a different wall outlet. Verify the power adapter is functioning. |
| Smartphone/AirPods not charging wirelessly. | Device not placed correctly; Device not wireless charging compatible; Phone case too thick; Foreign objects on charging pad. | Reposition the device to ensure it is centered on the charging pad. Remove any thick phone cases or metallic objects. Confirm your device supports Qi wireless charging. |
| Níl aon mhuirearú ar Apple Watch. | Watch not placed correctly; Watch charger not making contact; Watch model not supported. | Ensure the Apple Watch is securely placed on the magnetic charging disc. Remove any watch cases that might obstruct contact. This charger supports Apple Watch Series 2-7, SE. |
| Tá muirear mall nó uaineach. | Using a non-original power adapter/cable; Device overheating; Multiple devices charging simultaneously. | Use the provided power adapter and cable. Ensure the device is in a well-ventilated area. Charging multiple devices may slightly reduce individual charging speeds. |
| Alarm clock display is too bright/dim. | Ní mór an socrú gile a choigeartú. | Brúigh an Gile button to cycle through the 5 brightness levels, including 'off'. |
| Alarm is not sounding or is too quiet/loud. | Alarm not set or deactivated; Volume level too low/high. | Verify the alarm is activated (alarm icon visible). Adjust the alarm volume using the Toirt cnaipe. |
Sonraíochtaí
| Gné | Sonraigh |
|---|---|
| Toisí Táirge | 6.3 x 1.5 x 3.5 orlach |
| Meáchan Mír | 15.8 unsa |
| Branda | BUIFBEE |
| Cineál nascóirí | Gan sreang |
| Gléasanna Comhoiriúnacha | Cellular Phones, Apple Watch, AirPods (with wireless charging case) |
| Múnlaí Fón Comhoiriúnach | Samsung Galaxy S10 series, iPhone 8 and newer, other Qi-enabled phones |
| Gné Speisialta | Adjustable, Fast Charging, Wireless Charger, Wireless Charging |
| Ionchur Voltage | 9 Volta |
| Iomlán calafoirt USB | 1 (le haghaidh ionchuir cumhachta) |
| Wattage | 15 watts (max output) |
| Sonraíocht Met | Qi |
| Foinse Cumhachta | AC Adapter (Battery Powered refers to internal clock battery backup, not main power) |
Barántas agus Tacaíocht
Your BUFFBEE Alarm Clock with Wireless Charging Station comes with a standard manufacturer's warranty. For specific warranty details, including duration and coverage, please refer to the warranty card included in your product packaging or contact BUFFBEE customer support directly.
If you require technical assistance, have questions about product operation, or need to report a defect, please reach out to BUFFBEE customer service through the contact information provided on the product packaging or the official BUFFBEE websuíomh. Bíodh samhail do tháirge agus dáta ceannaigh réidh agat agus tú ag teagmháil leis an tacaíocht.