Réamhrá
This manual provides detailed instructions for the installation, operation, and maintenance of your Venstar T1900 Residential Slimline Platinum Thermostat. Please read this manual thoroughly before attempting to install or operate the thermostat to ensure proper function and to avoid potential damage.
Eolas Tábhachtach Sábháilteachta
- Always turn off power to the heating/cooling system at the main circuit breaker or fuse box before installing or servicing the thermostat.
- This thermostat operates on 24 Volts AC. Do not connect to line voltage (120V nó 240V).
- Ba chóir do theicneoir cáilithe an suiteáil a dhéanamh mura bhfuil tú eolach ar shreangú leictreach.
- Do not short circuit the terminals on the gas valve or at the system control to test the thermostat. This will damage the thermostat and void the warranty.
- Ensure all wiring connections are secure and insulated to prevent short circuits.
Ábhar an Phacáiste
Deimhnigh go bhfuil na míreanna seo a leanas i do phacáiste:
- Venstar T1900 Thermostat Unit
- Crua-earraí Gléasta (scriúnna agus ancairí balla)
- Lámhleabhar Úsáideora (an doiciméad seo)
Táirge Tharview
The Venstar T1900 is a 7-day programmable digital thermostat designed for residential use. It offers precise temperature control and energy-saving scheduling capabilities. This thermostat is compatible with heat/cool, heat pump, and dual-fuel systems, controlling up to three heat stages agus dhá fionnuar stagtá.
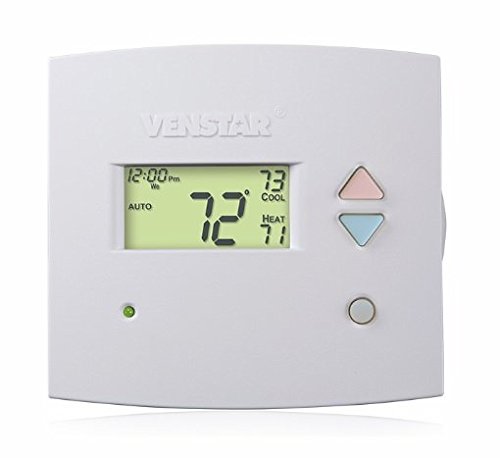
Fíor 1: Tosaigh view of the Venstar T1900 Thermostat. This image displays the thermostat's LCD screen and control buttons, indicating its slimline design.
Príomhghnéithe:
- In-ríomhchlárú 7 Lá: Ceadaíonn sé sceidil téimh agus fuaraithe saincheaptha do gach lá den tseachtain.
- Comhoiriúnacht an Chórais: Works with heat/cool, dual-fuel, and heat pump systems.
- Il-Stage Rialú: Manages up to three heat stages agus dhá fionnuar stagtá.
- Cumas Cianrialaithe: Controllable by phone using an optional add-on (sold separately).
- Automatic or Manual Operation: Provides flexibility for scheduled or on-demand temperature adjustments.
Treoir Suiteáil
Uirlisí Riachtanach:
- Scriúire (Phillips agus/nó ceann cothrom)
- Drill with appropriate drill bit (if installing new wall anchors)
- strippers sreang
- Peann luaidhe
- Leibhéal (roghnach)
1. Cumhacht Múch
Locate the circuit breaker or fuse box that controls your heating and cooling system. Turn off the power completely before proceeding with any wiring.
2. Remove Old Thermostat (if applicable)
- Bain clúdach do shean-theirmeastat go cúramach.
- Glac pictiúr de na naisc sreangaithe atá ann cheana féin mar thagairt.
- Label each wire with the terminal designation it was connected to (e.g., R, G, Y, W).
- Disconnect the wires and remove the old thermostat's mounting plate from the wall.
3. Gléasadh Bonn an Teirmeastait Nua
- Separate the front cover of the T1900 thermostat from its base plate.
- Position the base plate on the wall where you want to install the thermostat. Ensure it is level.
- Marcáil na poill gléasta le peann luaidhe.
- Druileáil poill phíolótacha más gá agus cuir ancairí balla isteach.
- Daingnigh pláta bonn an teirmeastait leis an mballa ag baint úsáide as na scriúnna a chuirtear ar fáil.
4. Sreangú
Connect the wires from your HVAC system to the corresponding terminals on the T1900 thermostat base. Refer to the wiring diagram provided with your specific HVAC system for precise connections. Ensure wires are stripped approximately 3/8 inch and securely fastened under the terminal screws.
Ainmniúcháin Choitianta Críochfoirt:
- R/Rc/Rh: 24V Power (Heating/Cooling)
- C: Common (24V return)
- G: Fan
- B/B1: Comhbhrúiteoir S.tage 1 (Fuarú)
- B2: Comhbhrúiteoir S.tage 2 (Fuarú)
- W/W1: Teas S.tage 1 (Teas)
- W2: Teas S.tage 2 (Teas)
- O / B: Reversing Valve (Heat Pumps)
Note: The T1900 supports various system types. Consult the detailed wiring diagrams in the full installation manual for specific configurations (e.g., heat pump with auxiliary heat, conventional multi-stage systems).
5. Ceangail an Teirmeastat leis an mBonn
Once wiring is complete and verified, carefully align the thermostat front cover with the mounted base plate and snap it into place.
6. Cumhacht a Athbhunú
Return to your circuit breaker or fuse box and restore power to your heating and cooling system.
Socrú Tosaigh
Upon initial power-up, the thermostat may prompt you to configure basic settings. Follow the on-screen instructions to set the current date, time, and system type (e.g., Conventional, Heat Pump).
System Type Configuration:
It is crucial to correctly configure the thermostat for your specific HVAC system. Incorrect settings can lead to improper operation or damage. Access the installer settings menu (refer to the full installation guide for specific button sequences) to select:
- Cineál Córais: Heat/Cool, Heat Pump, Dual Fuel
- Líon Teas Stages
- Líon na Cool Stages
- Reversing Valve Operation: O (Fuarú) nó B (Téamh)
Treoracha Oibriúcháin
An Taispeáint a Thuiscint:
The LCD screen displays the current temperature, set temperature, system mode, fan mode, time, and programming status. Refer to the icons and indicators on the screen for current operational status.
Setting System Mode:
Brúigh an MODE cnaipe chun dul trí na modhanna córais atá ar fáil:
- TEASA: The system will operate to maintain the heating setpoint.
- COOL: The system will operate to maintain the cooling setpoint.
- Uathoibríoch: The thermostat automatically switches between heating and cooling as needed to maintain the set temperature range.
- AS: Tá an córas téimh agus fuaraithe múchta.
Setting Fan Mode:
Brúigh an FAN cnaipe chun dul trí mhodhanna lucht leanúna:
- Uathoibríoch: Ní ritheann an lucht leanúna ach amháin nuair a bhíonn an córas téimh nó fuaraithe ag feidhmiú go gníomhach.
- AR: Ritheann an lucht leanúna go leanúnach, beag beann ar ghlaonna téimh nó fuaraithe.
Teocht Coigeartaithe:
Bain úsáid as an UP agus SÍOS arrow buttons to adjust the desired temperature setpoint. In programmable modes, this will temporarily override the schedule until the next scheduled change.
Programming Schedules (7-Day):
The T1900 allows for 7-day programming, enabling different schedules for each day of the week. This feature helps save energy by adjusting temperatures when you are away or asleep.
- Brúigh an CLÁR cnaipe chun modh ríomhchlárúcháin a chur isteach.
- Bain úsáid as an LÁ button to select the day or group of days you wish to program (e.g., Mon-Fri, Sat-Sun, or individual days).
- Bain úsáid as an AMACH button to cycle through the four available periods: Wake, Leave, Return, Sleep.
- Bain úsáid as an UP agus SÍOS arrow buttons to set the desired temperature for each period.
- Bain úsáid as an LEANBH button to exit programming mode or save changes.
Refer to the detailed programming section in the full user guide for advanced options and specific button sequences.
Remote Control (Optional Add-on):
The Venstar T1900 thermostat can be controlled remotely via a phone using an optional add-on module (sold separately). This module connects to the thermostat and allows for remote access and control through a dedicated application. Installation and setup instructions for the remote control module are provided with the module itself.
Cothabháil
Cleaning the Thermostat:
Chun cuma agus feidhmiúlacht do theirmeastait a choinneáil, glan an taobh amuigh go tréimhsiúil le clúdach bog, tirim.amp cloth. Do not use abrasive cleaners, solvents, or chemical sprays, as these can damage the plastic and electronic components.
Athsholáthar Ceallra:
The Venstar T1900 thermostat does not require batteries for operation as it is powered by the 24V AC system.
Fabhtcheartú
If you experience issues with your Venstar T1900 thermostat, consult the following common problems and solutions:
| Fadhb | Cúis Féideartha | Réiteach |
|---|---|---|
| Tá taispeáint teirmeastat bán | Gan aon chumhacht chuig an teirmeastat. | Check the circuit breaker for your HVAC system. Ensure all wiring connections are secure. |
| Heating/Cooling system does not respond | Mód córais mícheart roghnaithe; fadhb sreangaithe; glasáil córais. | Verify the system mode (HEAT/COOL/AUTO). Check wiring connections. Wait 5 minutes for system lockout to reset. |
| Is cosúil go bhfuil léamh teochta mícheart | Suíomh an teirmeastait; bac ar an braiteoir. | Ensure the thermostat is not exposed to direct sunlight, drafts, or heat sources. Clean any dust from the thermostat vents. |
| Programming schedule is not working | Program not saved; temporary override active; incorrect time/day setting. | Ensure programs are saved. Check if a temporary override is active and cancel it. Verify current time and day settings. |
| Ritheann an luchtóir go leanúnach i mód AUTO | Fan mode set to ON; wiring issue. | Press the FAN button to ensure it is set to AUTO. Check fan wiring. |
If these solutions do not resolve the issue, please contact customer support or a qualified HVAC technician.
Sonraíochtaí
| Gné | Sonraíocht |
|---|---|
| Branda | Venstar |
| Ainm an tSamhail | Tiománaí do Venstar T1900 |
| Cineál Rialaitheora | Brúigh Cnaipe |
| Gné Speisialta | In-ríomhchláraithe |
| Dath | Bán |
| Úsáidí Sonracha Do Tháirge | Heat Pump, Heater |
| Cineál Rialú Teochta | Programmable, Smart/Remote (with add-on) |
| Imltage | 24 Volta AC |
| Cineál Taispeána | LCD nó LED |
| Modh Rialaithe | Remote (with add-on) |
| Cúlsolas | Tá |
| Toisí Táirge | 5.3 x 2 x 2 orlach |
| Meáchan Mír | 0.01 Unsa |
| Cadhnraí ag Teastáil? | Níl |
Faisnéis Bharántas
Venstar products are manufactured to high-quality standards. This product is covered by a limited warranty against defects in materials and workmanship. The specific terms and duration of the warranty may vary. Please refer to the warranty card included with your product or visit the official Venstar websuíomh gréasáin le haghaidh faisnéis mhionsonraithe faoi bharántas agus nósanna imeachta clárúcháin.
Tacaíocht do Chustaiméirí
For technical assistance, troubleshooting, or warranty inquiries, please contact Venstar customer support. You can typically find contact information, including phone numbers and email addresses, on the official Venstar websuíomh (www.venstar.com) or on the product packaging.
When contacting support, please have your thermostat model number (T1900) and any relevant purchase information ready.